
Share a server
Let another group's computers reach a server that belongs to your group, with that group's own rules and its own approvers. Then pick which group you go in through when you connect.
How sharing works
1. How sharing works
A server belongs to one group, its home group. Sharing it with another group lets that group's people see the server and write rules for their own computers. Nothing else moves: the home group keeps the server and stays the only place that edits, deletes or moves it.
Each group approves its own people. A connection made through a shared group is approved by the admins of that group, not by the admins of the home group.
The group that receives a server never sees the name of the home group. Sharing needs gateway 0.41 or later, OSH - Signer on the iPhone and the web admin console.
Open Servers
3. Open Servers
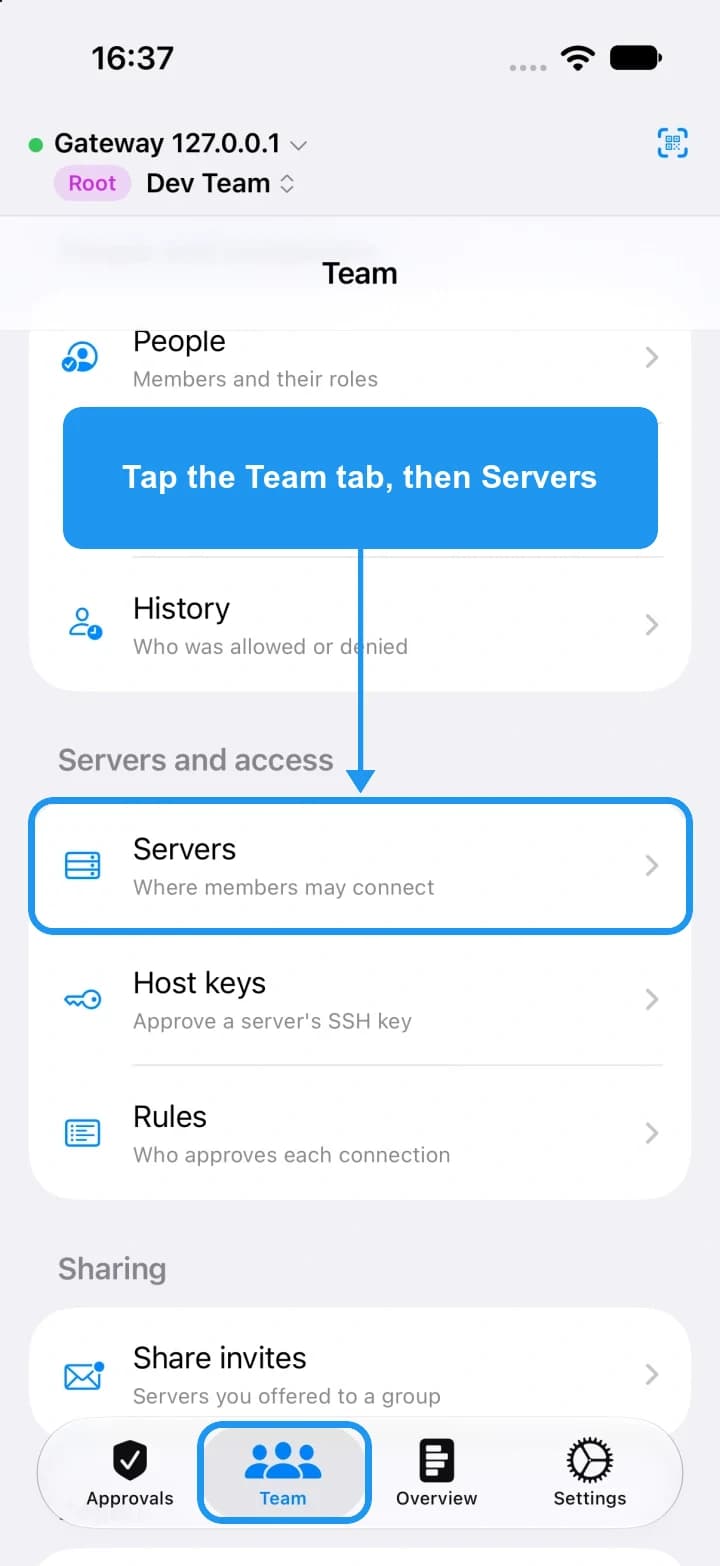
In OSH - Signer, choose the group that owns the server (the home group), then tap Team in the bar at the bottom. Under Servers and access, tap Servers.
Pick the server
4. Pick the server
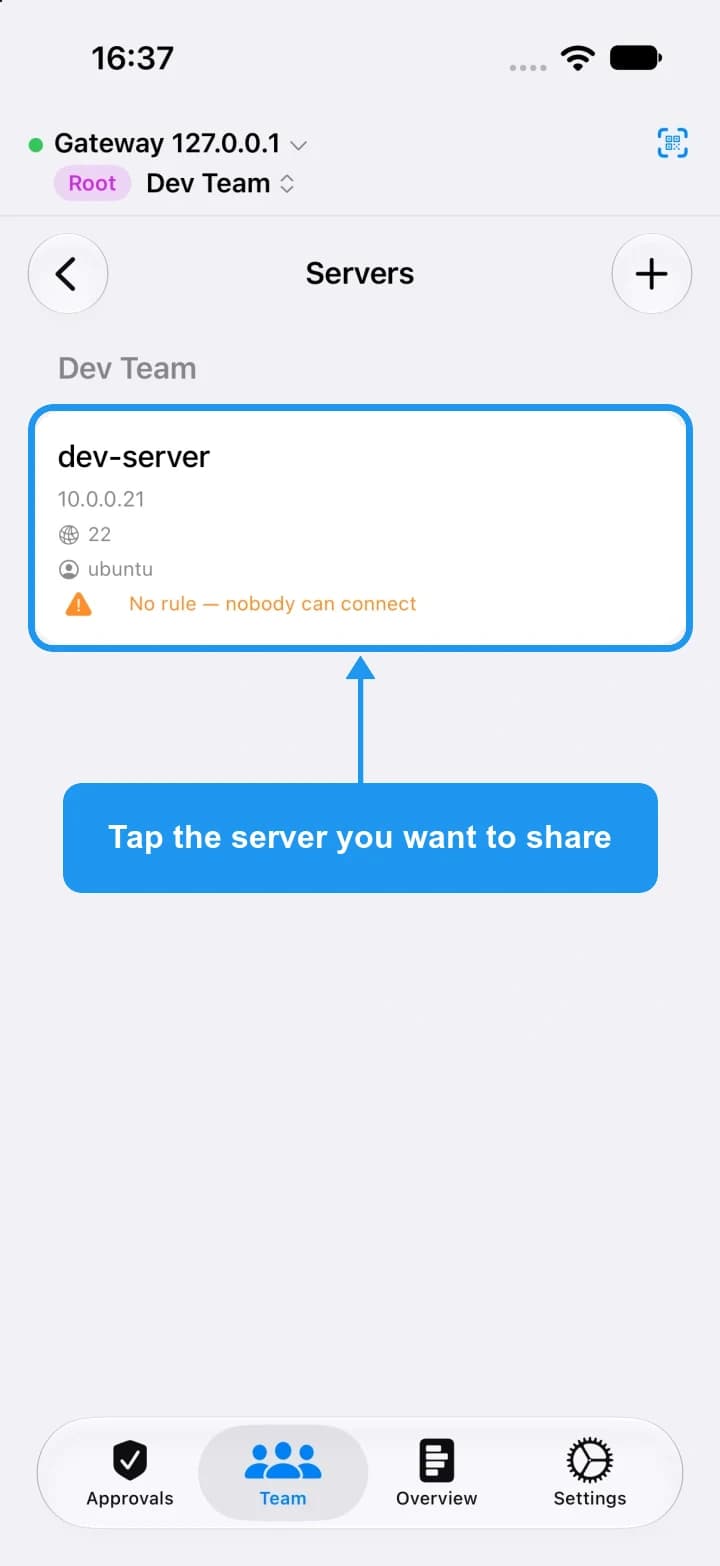
The list shows the servers of your group. Tap the server you want to share. Its details open.
Share it yourself
5. Share it yourself
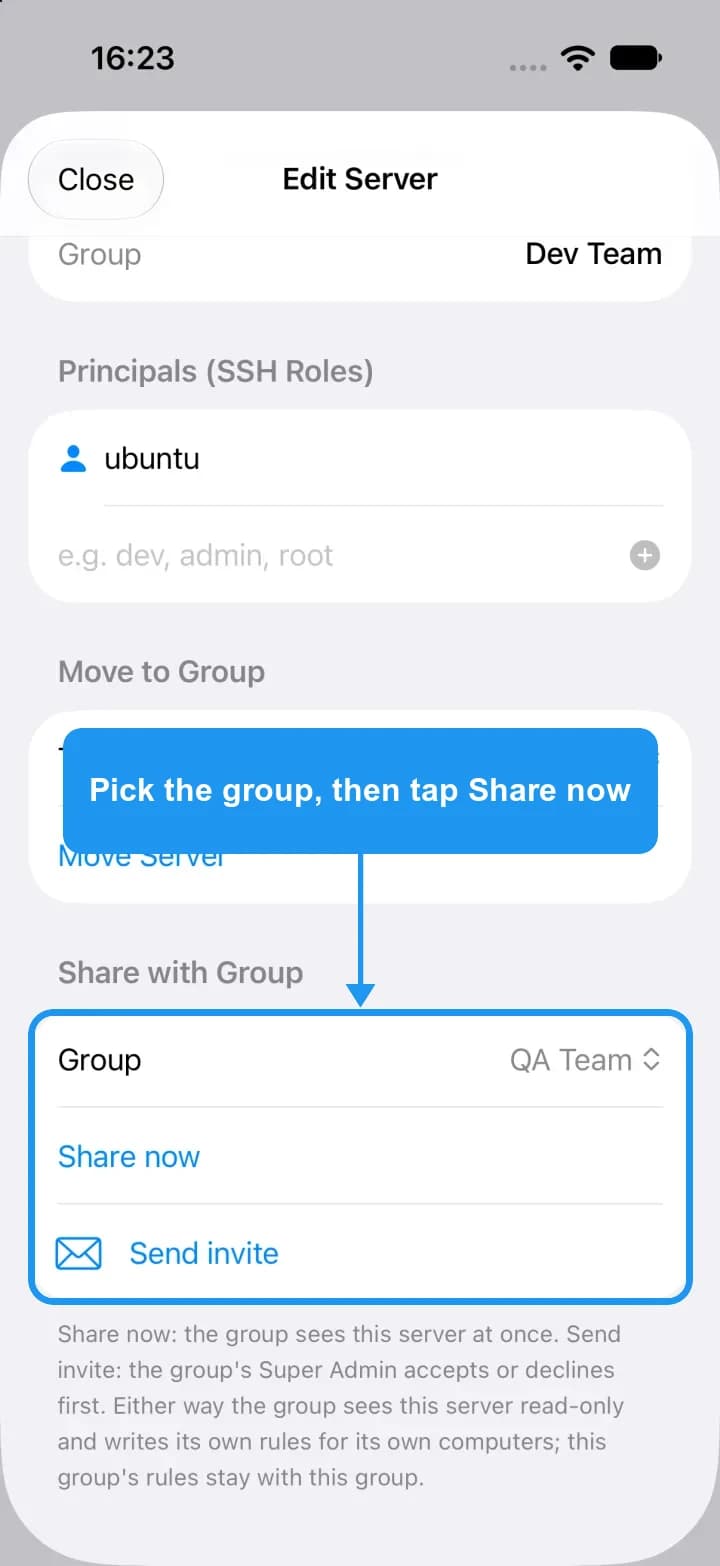
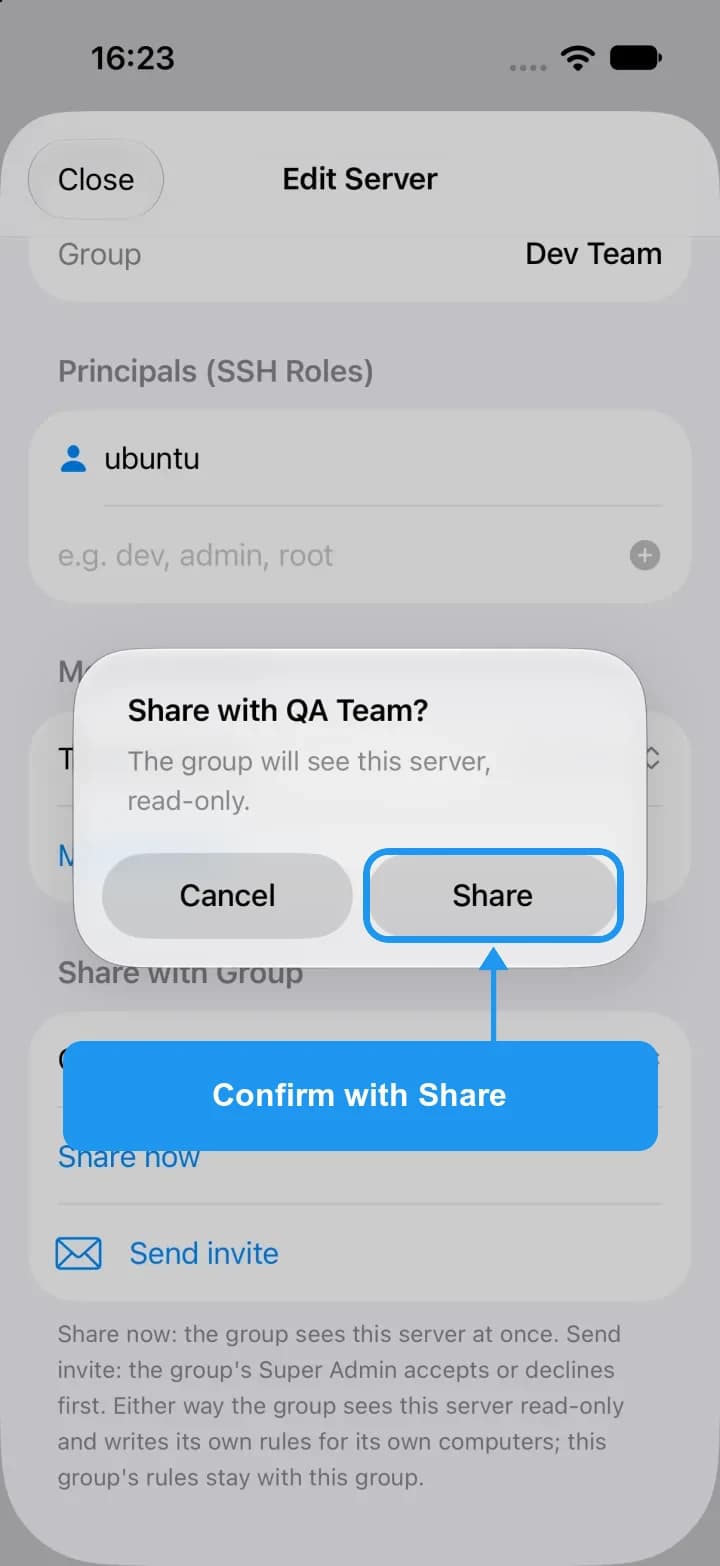
On the server's details, scroll down to Share with Group, choose the group that receives it, and tap Share now. A box asks Share with that group? Tap Share. The web admin console has the same section on the Servers tab.
Root sees two buttons here, Share now and Send invite. A super admin who is not root shares directly, so there is no invite to wait for.
What the other group sees
6. What the other group sees
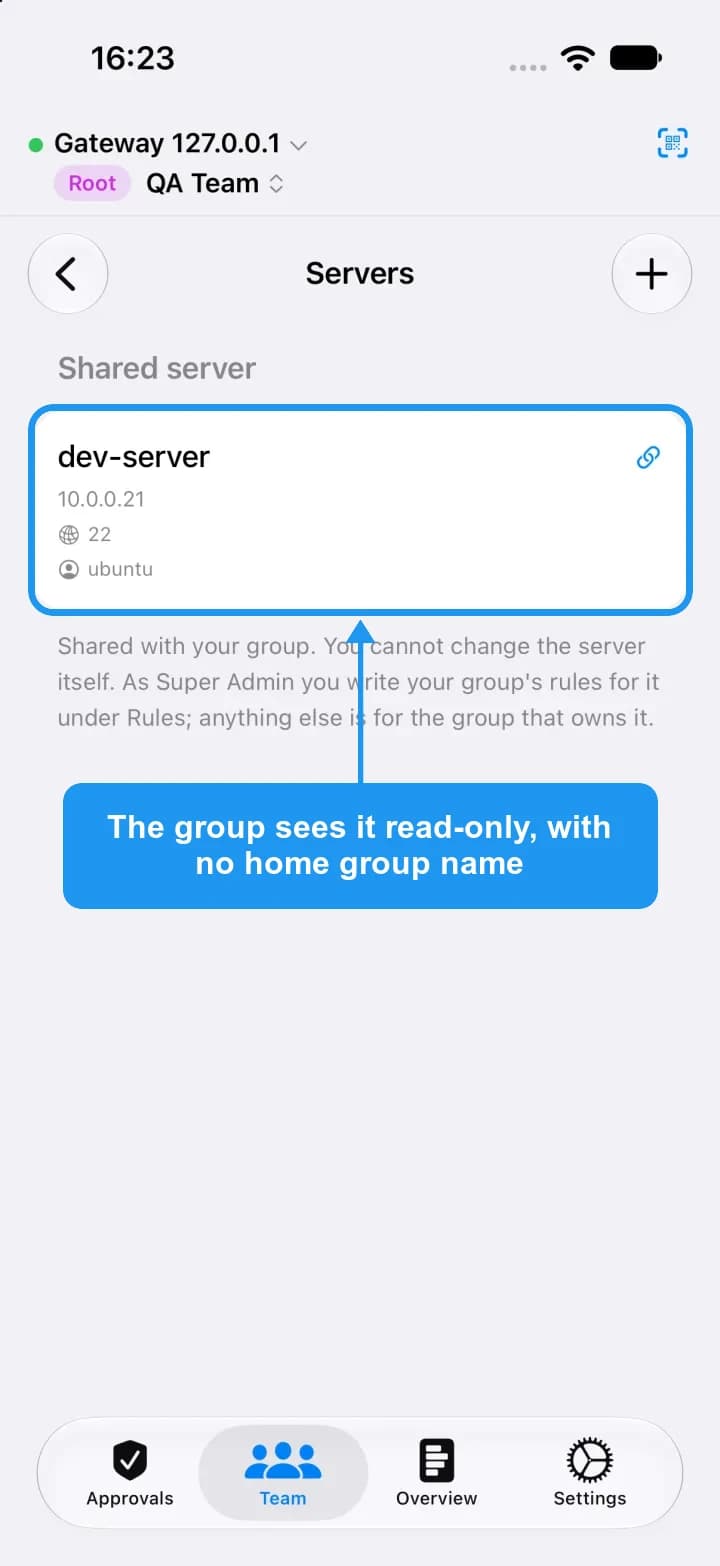
Switch to the receiving group and open Servers. The server is listed under Shared server, read-only, with no home group name and no tags. A note says that the group's super admin writes its own rules for it under Rules.
Root: Share now or Send invite
7. Root: Share now or Send invite
Root has two buttons on a server. Share now shares at once, with no answer needed. Send invite sends the offer to the super admin of the receiving group, and the server is shared only when they accept.
Use Send invite when the other group should agree first. A group with no super admin cannot be invited: use Share now for it.
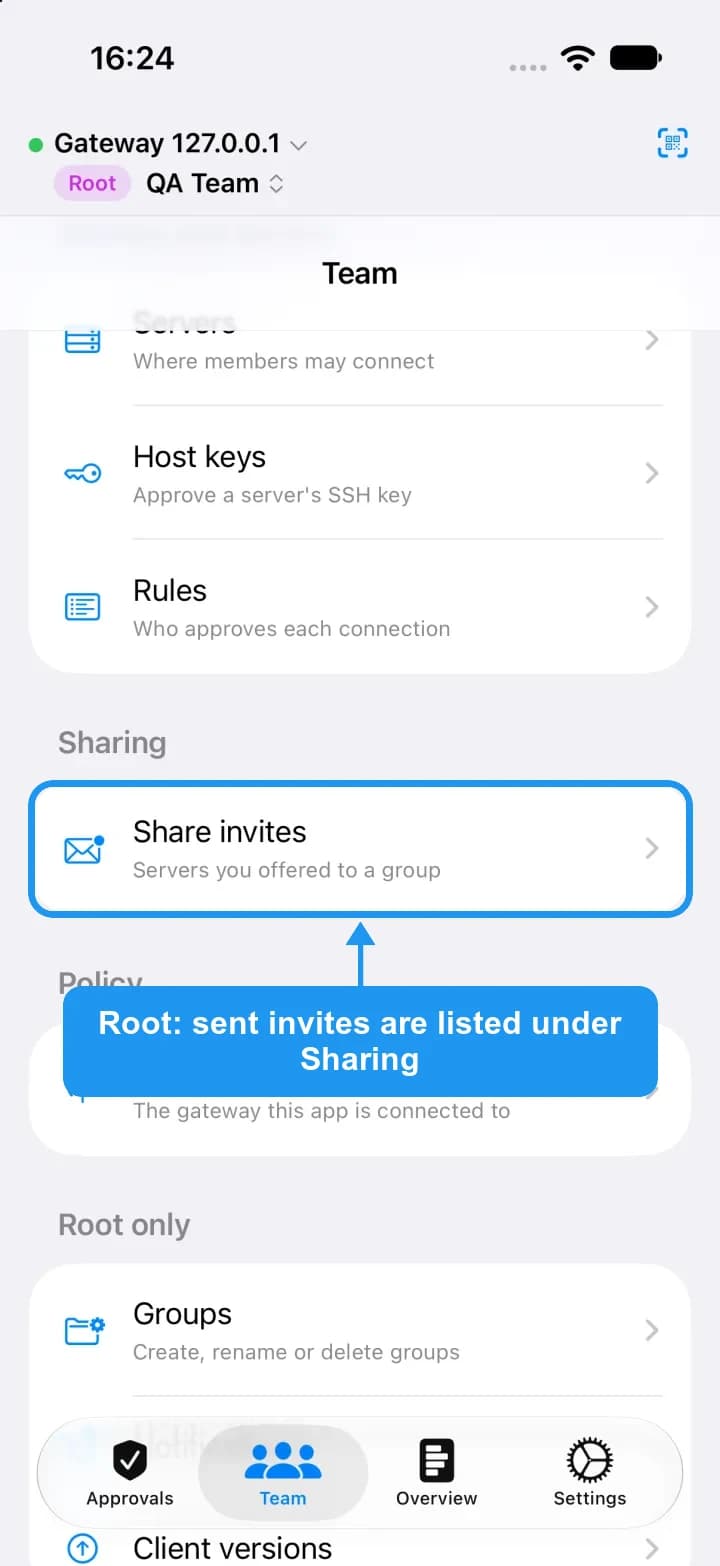
An invite expires after seven days. Root finds the invites it sent on the Team tab, under Sharing, in Share invites (servers you offered to a group), and can cancel one before it is answered.
Answer an invite
8. Answer an invite
The super admin of the receiving group gets a notification: a server share invite arrived for their group. Tap it to open the invites list, check the server name, host and port, then tap Accept or Decline and confirm with Face ID. The same list is in the web admin console.
The notification does not name the server or the home group. The details are read from the gateway when you open the list.
An invite that is answered late, after the server was moved or deleted or was already shared with your group, is refused with a clear reason. Declined and cancelled invites stay in the list, closed.
Write rules for your group
9. Write rules for your group
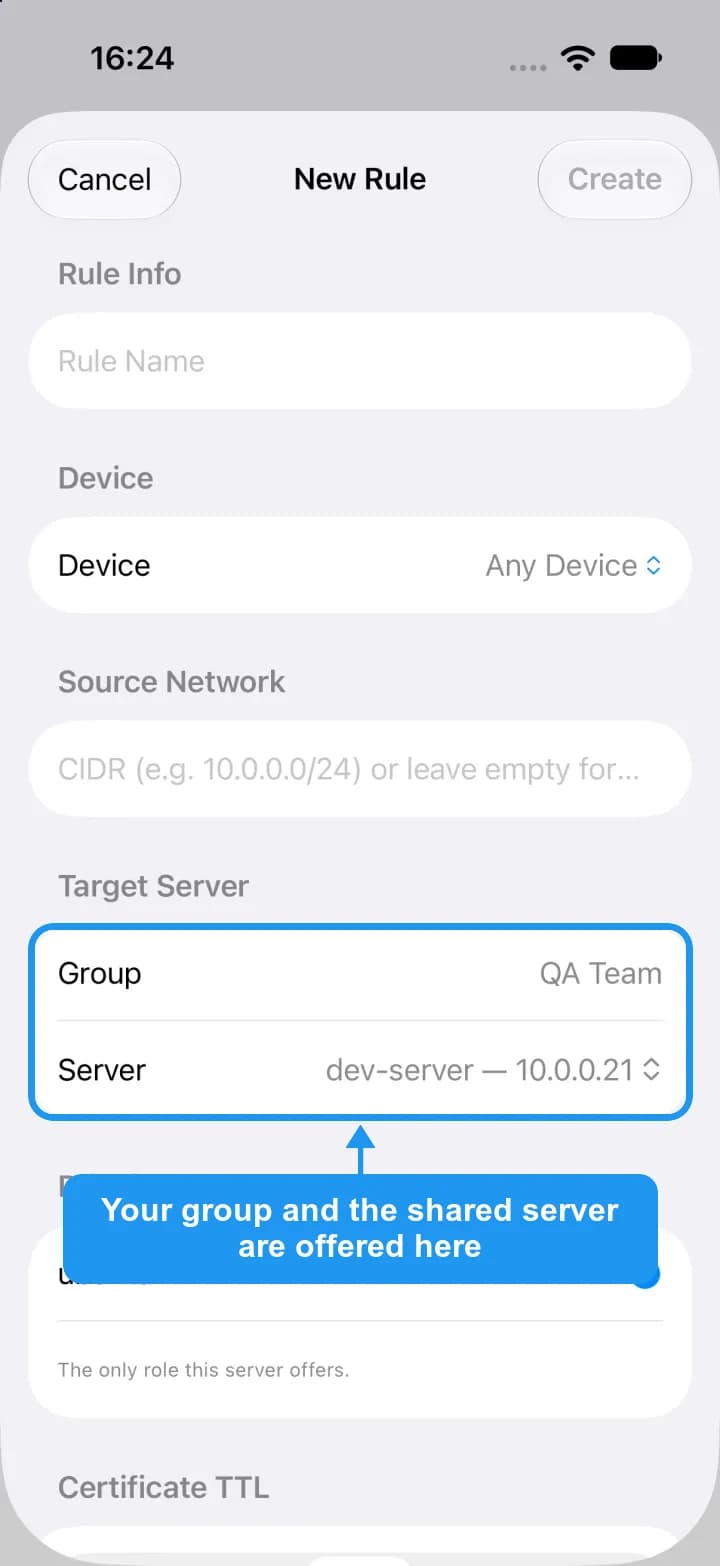
Once a server is shared with your group, the super admin of your group can create a rule for it, in OSH - Signer or in the web admin console, as in Create a rule. On the Team tab choose your group, tap Rules, then Create Rule. Under Target Server the group is yours and the shared server is offered in the Server list. The rule belongs to your group.
Only your group's computers and your group's admins are offered. A rule for all computers covers only the computers of your group, never those of the home group.
Your group's admins approve these connections, so the home group's admins are not asked about your people.
You see only the rules your group owns on the server. You cannot edit or delete a rule owned by another group.
What the home group sees
10. What the home group sees
The home group sees every rule on its server, and a rule written by a receiving group shows that group's name. The home group can delete such a rule, which switches that access off at once, but cannot edit it, so the rule stays what the other group signed.
The ledger records who shared, invited, accepted, declined and cancelled, and rules written by a receiving group carry both group names.
Connect through a group
11. Connect through a group
If your computer is in two groups that can both reach the same server, you decide which group you go in through. That group's rules apply and its admins approve the request. In OSH - Client on the desktop, the server appears under each group it can be reached through. Double-click the one you mean.
A server reachable through only one group appears once, and connecting works as it always did.
A group you did not choose is never asked. If the group you chose has no rule for you, the connection is refused; it does not fall back to another group.
Connect from the terminal
12. Connect from the terminal
In the terminal, name the group with --group. It takes the group name or its id. Use the id if two of your groups have the same name.
osh connect ubuntu@dev-server --group QC-Gr-CReplace the user, the server and the group with yours.
More than one of your Groups can reach dev-server. Say which to go in through: Group A (id 12) Group C (id 31)Run again with --group <name or id>, e.g. osh connect <user>@dev-server --group "Group A"
Without --group, osh connects as before when only one of your groups can let you in. When more than one can, it stops before asking anyone and lists your groups; run it again with --group and the one you want.
A name that matches none of your groups, or two of them, is an error before any request is sent, so no approver is woken for a typo.
Approve a request through a group
13. Approve a request through a group
A request made through a group goes to that group's approvers. In OSH - Signer, tapping the notification opens the group the request was made through, and the card is shown there and not in the home group.
See Approve a connection for the rest.
Stop sharing
14. Stop sharing
The home group's super admin, the receiving group's super admin and root can stop a share. The home group can always take its server back. In the web admin console, the confirmation tells you how many rules of the receiving group will be deleted, and which, before you sign.
Stopping a share deletes the rules the receiving group wrote on that server, and its computers lose access at once.
A rule of the home group that names a computer found only in the receiving group blocks the stop, so you never cut access you gave on purpose. Delete that rule first.
Moving a server to another group also clears its shares and the receiving groups' rules on it.